Removing thermal paste from your CPU and heatsink is an important step when upgrading or maintaining your computer’s cooling system. Proper removal ensures optimal heat transfer and prevents potential damage to your components. In this guide, we’ll provide a simple, step-by-step process to help you remove thermal paste effectively. Let’s get started!
Why Remove Thermal Paste?
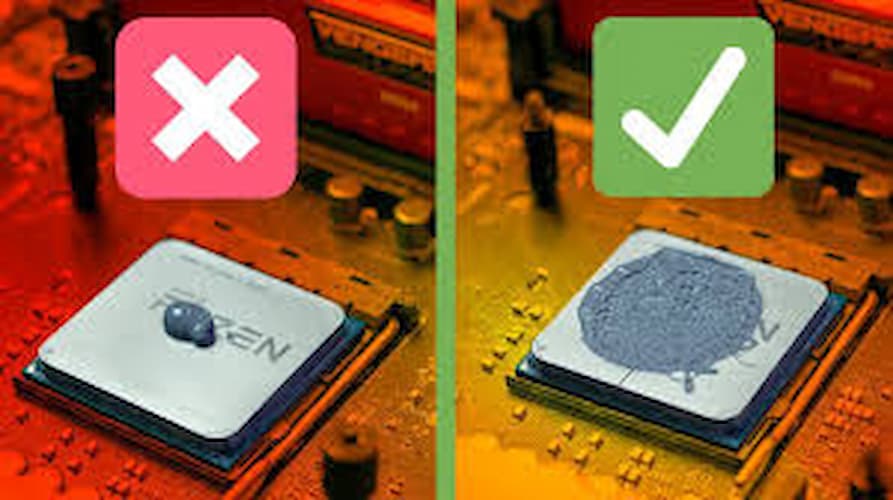
Thermal paste, also known as thermal compound, is used to fill the microscopic gaps between the CPU and heatsink, allowing for better heat dissipation. Over time, thermal paste can dry out or become contaminated, reducing its effectiveness. Removing old thermal paste and applying a fresh layer ensures that your CPU stays cool and performs optimally.
What You’ll Need:
To remove thermal paste, you’ll need a few basic items:
- Isopropyl Alcohol: 90% or higher concentration is recommended for cleaning.
- Lint-Free Cloth or Coffee Filter: For wiping off the thermal paste without leaving fibers behind.
- Cotton Swabs: For detailed cleaning in small areas.
- Plastic Card: An old credit card or plastic scraper to help remove the bulk of the paste.
How to Remove Thermal Paste: Step-by-Step
Follow these steps to safely remove thermal paste from your CPU and heatsink:
1. Power Off and Unplug Your PC:
Before you begin, ensure your PC is powered off and unplugged from the wall to prevent any electrical accidents.
2. Remove the Heatsink:
- Open Your PC Case: Use a screwdriver to remove the side panel.
- Detach the Heatsink: Carefully detach the heatsink from the CPU. This usually involves loosening screws or clips.
3. Remove the Bulk of the Thermal Paste:
- Use a Plastic Card: Gently scrape off the majority of the thermal paste from the CPU and heatsink using the edge of a plastic card. Be careful not to scratch the surface.
- Dispose of the Waste: Wipe the removed paste onto a paper towel or disposable cloth.
4. Clean the Residual Paste:
- Dampen a Cloth with Isopropyl Alcohol: Moisten a lint-free cloth or coffee filter with isopropyl alcohol.
- Wipe the Surfaces: Gently wipe the CPU and heatsink surfaces to remove any remaining thermal paste. Use a cotton swab dipped in alcohol for detailed cleaning around edges and small areas.
- Repeat if Necessary: Continue cleaning until both surfaces are free of paste and appear clean and shiny.
5. Let it Dry:
Allow the cleaned surfaces to air dry completely. Isopropyl alcohol evaporates quickly, so this should only take a few minutes.
6. Reapply New Thermal Paste (Optional):
If you’re planning to reinstall the heatsink, apply a new layer of thermal paste. This ensures optimal heat transfer between the CPU and heatsink.
7. Reattach the Heatsink:
- Position the Heatsink: Carefully place the heatsink back onto the CPU.
- Secure the Heatsink: Tighten the screws or reattach the clips to hold the heatsink in place.
8. Close Your PC Case:
Once the heatsink is securely attached, close your PC case and fasten any screws you removed earlier.
Tips for Best Results:
- Use High-Quality Isopropyl Alcohol: A higher concentration of alcohol ensures better cleaning and faster evaporation.
- Be Gentle: Avoid applying excessive pressure when cleaning to prevent damage to the CPU or heatsink.
- Work in a Clean Environment: Minimize dust and contaminants to ensure a clean application of new thermal paste.
By following these steps, you can effectively remove old thermal paste from your CPU and heatsink, ensuring optimal cooling performance for your computer. Regular maintenance like this can help extend the lifespan of your components and keep your PC running smoothly.