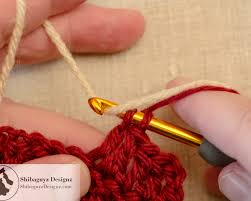
Joining yarn in the middle of a crochet row is a common task for crocheters, whether you’re changing colors or starting a new skein. This guide will walk you through the process step-by-step, ensuring a seamless transition that blends beautifully into your project.
Why You Might Need to Join Yarn Mid-Row
There are several reasons you might need to join yarn in the middle of a row:
- Running Out of Yarn: When you run out of yarn and need to start a new skein.
- Changing Colors: For creating patterns or stripes.
- Fixing Mistakes: If you need to cut and rejoin yarn to fix errors.
Steps to Join Yarn in Crochet Mid-Row
1. Prepare the New Yarn
- Cut the Yarn:
- Cut the old yarn, leaving a tail of about 6 inches. This tail will be woven in later.
- Position the New Yarn:
- Lay the new yarn alongside the old yarn with a tail of about 6 inches.
2. Begin the Join
- Overlap the Yarn:
- Hold the new yarn and the old yarn together, overlapping them for a few stitches.
- Start Crocheting:
- Insert your hook into the next stitch as usual.
- Yarn over with both the old and new yarns held together and pull through.
3. Secure the Join
- Crochet a Few Stitches:
- Continue crocheting with both yarns held together for 2-3 stitches.
- Drop the old yarn and continue with just the new yarn.
- Tighten the Join:
- Pull gently on the tails of both the old and new yarn to secure the join and ensure it is snug.
4. Weave in the Ends
- Use a Tapestry Needle:
- Thread the tails of the old and new yarn onto a tapestry needle.
- Weave Through Stitches:
- Weave the ends through the stitches on the backside of your work to hide them.
- Trim Excess Yarn:
- Trim any excess yarn after weaving in the ends securely.
Tips for a Seamless Join
- Match Yarn Tension:
- Keep the tension consistent when joining new yarn to avoid noticeable changes in your work.
- Use a Russian Join:
- For an even more secure and seamless join, consider using the Russian join method, which involves threading the yarn back through itself.
- Practice Invisible Joins:
- Practice makes perfect. Try different techniques to see which gives the best results for your projects.
Common Issues and Solutions
Loose Joins
- Solution: Make sure to overlap the old and new yarns for a few stitches and pull the tails tight.
Bulky Joins
- Solution: Use a tapestry needle to split the yarn fibers and weave them in more smoothly to reduce bulk.
Visible Joins
- Solution: Match the yarn color and thickness closely. Consider using the Russian join for an invisible seam.
Conclusion
Joining yarn in the middle of a crochet row is a skill that every crocheter should master. By following these simple steps, you can ensure that your joins are secure and nearly invisible, making your crochet projects look professional and polished. Happy crocheting!


