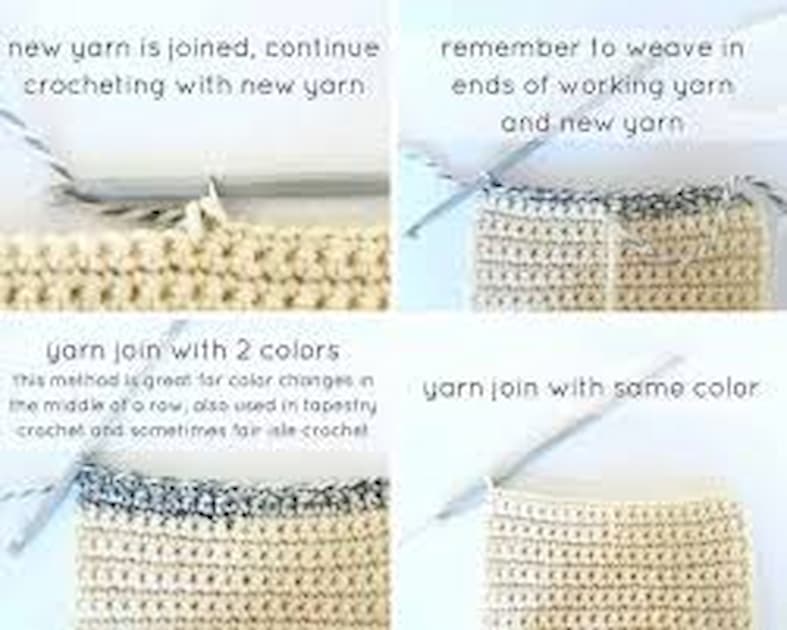
Joining yarn in crochet is an essential skill for creating seamless projects, whether you’re working on a large blanket or a delicate scarf. This guide will walk you through various methods to join yarn, ensuring your work is both durable and visually appealing.
Why Proper Yarn Joining Matters
Properly joining yarn is crucial for several reasons:
- Seamlessness: A well-executed join ensures your crochet project looks neat and professional.
- Durability: Secure joins prevent your work from unraveling over time.
- Ease of Continuation: Smooth joins make it easier to continue crocheting without interruptions.
Popular Methods for Joining Yarn in Crochet
There are several techniques to join yarn in crochet, each with its advantages. Here, we’ll explore some of the most popular methods.
1. The Basic Knot Method
Step-by-Step Instructions
- End the Old Yarn: When you reach the point where you need to join the new yarn, leave a tail of about 6 inches.
- Tie a Knot: Lay the old and new yarns parallel to each other. Tie a simple knot with the two strands.
- Continue Crocheting: Start crocheting with the new yarn, making sure the knot is tight and secure.
- Weave in the Ends: Once you’ve joined the new yarn, weave in the tails on the wrong side of your work to hide them.
Pros and Cons
- Pros: Simple and quick.
- Cons: The knot can be bulky and may show through in delicate projects.
2. The Russian Join
Step-by-Step Instructions
- Prepare the Yarns: Cut the old and new yarns, leaving a tail of about 6 inches.
- Thread the Needle: Thread a tapestry needle with the tail of the old yarn.
- Weave Back: Insert the needle back into the old yarn, weaving it through the fibers for about an inch.
- Insert New Yarn: Thread the new yarn onto the needle and weave it back through itself in the same manner.
- Pull Tight: Pull both ends to ensure the join is secure.
- Trim Excess: Trim any excess yarn if needed.
Pros and Cons
- Pros: Creates a seamless and almost invisible join.
- Cons: Takes more time and effort compared to simpler methods.
3. The Spit Splice (Felted Join)
Step-by-Step Instructions
- Prepare the Yarns: Overlap the ends of the old and new yarns by about 4 inches.
- Moisten the Yarn: Slightly moisten the overlapped section (using water or a small amount of spit).
- Rub Together: Rub the moistened section between your palms until the fibers felt together.
- Continue Crocheting: Start crocheting with the new yarn.
Pros and Cons
- Pros: Seamless join; ideal for 100% wool or animal fibers.
- Cons: Not suitable for synthetic yarns or blends.
4. The Magic Knot
Step-by-Step Instructions
- Tie Knots: Tie a knot in the end of the old yarn and another knot in the end of the new yarn.
- Join Knots: Tie the two knots together.
- Pull Tight: Pull the ends of the yarn to tighten the knots against each other.
- Trim Ends: Trim the tails close to the knot.
Pros and Cons
- Pros: Secure and invisible join; great for continuous projects.
- Cons: Can be challenging to untie if needed.
Tips for Successful Yarn Joining
Choose the Right Method
Consider the type of yarn and the project you’re working on. For example, the Russian Join is excellent for fine work, while the Magic Knot is suitable for thicker yarns.
Practice Makes Perfect
Try practicing each method on a swatch before applying it to your main project. This will help you understand the technique and ensure a flawless join.
Maintain Tension
Keep an even tension when joining yarn to prevent gaps or lumps in your work. Consistent tension ensures a smooth and professional finish.
Weave in Ends Securely
Regardless of the joining method, always weave in the ends securely. This prevents the yarn from unraveling and keeps your project intact.
Common Mistakes to Avoid
Ignoring Yarn Type
Different yarn types react differently to various joining methods. Ensure the method you choose is compatible with your yarn.
Leaving Short Tails
Always leave a tail of about 6 inches when joining yarn. Short tails can come loose, causing your join to unravel.
Skipping the Weaving Process
Weaving in the ends is crucial for a neat finish. Skipping this step can lead to visible joins and potential unraveling.
Conclusion
Joining yarn in crochet is a fundamental skill that enhances the quality and durability of your projects. By mastering different joining techniques and following the tips provided, you can achieve seamless and professional-looking results. Whether you’re working on a large blanket or a delicate scarf, the right yarn join method will ensure your work stands out.
This guide provides clear and actionable steps for crocheters of all levels to effectively join yarn. By adhering to SEO best practices, the post is optimized to rank well in search results and offer valuable, relevant information to your audience.


