Related Articles


Adobe Illustrator is a powerful tool for creating vector graphics. One essential skill for any Illustrator user is knowing how to join paths. Joining paths is crucial for creating seamless, professional-looking designs. This guide will walk you through the steps to join paths in Illustrator, providing tips and techniques to ensure precision and efficiency.
Why Join Paths in Illustrator?
1. Create Seamless Designs
Joining paths helps create continuous, smooth shapes without gaps, ensuring your designs look polished and professional.
2. Simplify Editing
Combining multiple paths into a single path makes it easier to edit and manipulate your designs.
3. Improve Workflow
Mastering the technique of joining paths can significantly improve your efficiency and workflow in Illustrator.
Tools and Techniques to Join Paths in Illustrator
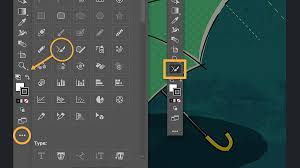
1. Pen Tool
The Pen Tool is used for creating and modifying paths in Illustrator. It allows you to add, delete, and adjust anchor points.
2. Join Command
The Join command connects two selected endpoints with a straight or curved line, creating a single path.
3. Pathfinder Panel
The Pathfinder panel offers various options to combine, divide, and manipulate paths and shapes.
4. Direct Selection Tool
The Direct Selection Tool allows you to select and manipulate individual anchor points and segments of a path.
Steps to Join Paths in Illustrator
1. Using the Pen Tool
- Step 1: Select the Pen Tool (P) from the Tools panel.
- Step 2: Click to create anchor points and draw your paths.
- Step 3: To join two paths, make sure the endpoints are close to each other.
2. Using the Join Command
- Step 1: Select the paths you want to join using the Selection Tool (V).
- Step 2: With the paths selected, go to the top menu and choose Object > Path > Join or use the shortcut Ctrl+J (Windows) or Cmd+J (Mac).
- Step 3: The Join command will connect the selected endpoints, creating a continuous path.
3. Using the Pathfinder Panel
- Step 1: Select the paths you want to join.
- Step 2: Open the Pathfinder panel by going to Window > Pathfinder.
- Step 3: Choose the Unite option to combine the selected paths into a single shape.
4. Using the Direct Selection Tool
- Step 1: Select the Direct Selection Tool (A) from the Tools panel.
- Step 2: Click on the anchor point of the path you want to adjust.
- Step 3: Drag the anchor point to connect it with another path’s endpoint.
- Step 4: Use the Object > Path > Join command if needed to finalize the connection.
Tips for a Seamless Join
1. Align Endpoints Precisely
Ensure the endpoints of the paths you want to join are perfectly aligned for a seamless connection.
2. Use Smart Guides
Enable Smart Guides by going to View > Smart Guides. This helps in aligning and snapping points together accurately.
3. Adjust Anchor Points
Use the Direct Selection Tool to fine-tune the position of anchor points before joining paths.
4. Smooth Out Curves
After joining paths, use the Pen Tool or Direct Selection Tool to adjust curves and ensure smooth transitions between segments.
Common Questions About Joining Paths in Illustrator
Can I join multiple paths at once?
Yes, you can select multiple paths and use the Join command to connect their endpoints in one step.
What if the Join command doesn’t work?
Ensure the endpoints of the paths you want to join are close enough. If they are too far apart, Illustrator may not join them correctly.
Can I join open and closed paths?
You can join open paths to create a single continuous path. However, joining an open path to a closed path will convert the closed path into an open path.
Advanced Techniques
1. Joining Paths with Different Strokes
If the paths have different stroke weights or styles, adjust them before joining to ensure a consistent appearance.
- Step 1: Select the paths and go to the Stroke panel.
- Step 2: Adjust the stroke weight and style to match.
2. Joining Complex Shapes
For more complex shapes, use a combination of the Pen Tool, Pathfinder Panel, and Direct Selection Tool to achieve the desired result.
- Step 1: Break down the shape into simpler segments.
- Step 2: Join each segment using the appropriate tool.
- Step 3: Refine the shape by adjusting anchor points and curves.
Conclusion
Joining paths in Illustrator is a fundamental skill that enhances your design capabilities and workflow efficiency. By following the steps outlined in this guide and utilizing the right tools and techniques, you can create seamless and professional designs. Practice these methods to master the art of joining paths and take your Illustrator projects to the next level. Start experimenting today and enjoy the creative possibilities that come with joining paths in Illustrator.
