Related Articles


Joining binding strips on a quilt is an essential skill for quilters, as it provides a neat and professional finish to the edges of a quilt. Whether you’re a beginner or an experienced quilter, mastering the art of joining binding strips will elevate the quality of your quilt projects. In this comprehensive guide, we’ll walk you through the process of joining binding strips on a quilt step-by-step, ensuring a flawless result every time.
Step 1: Prepare Your Binding Strips:
Before joining the binding strips, ensure that you have prepared them correctly. Cut your fabric into strips of the desired width, usually 2.5 inches, and join them together at a 45-degree angle to create a continuous strip. Press the seams open to reduce bulk and ensure smooth, flat binding.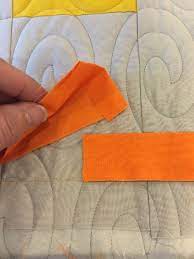
Step 2: Determine the Length of Binding Needed:
Measure the perimeter of your quilt to determine the length of binding needed. Add extra length to accommodate the corners and the finishing tails. Once you have calculated the required length, trim the binding strip accordingly.
Step 3: Attach the Binding to the Quilt:
Starting along one edge of the quilt, leave a tail of binding strip hanging loose and begin pinning or clipping the binding to the raw edges of the quilt, aligning the raw edges of the binding strip with the raw edges of the quilt. Leave a gap of a few inches between the starting point and the first corner.
Step 4: Miter the Corners:
As you approach the first corner, stop stitching a quarter inch away from the edge of the quilt. Fold the binding strip up and away from the quilt at a 45-degree angle, creating a diagonal fold. Then, fold the binding strip back down, aligning the raw edge with the next side of the quilt. Continue stitching along the next side, repeating the process for each corner.
Step 5: Join the Binding Ends:
When you reach the starting point, leave a gap between the loose end of the binding strip and the starting point. Trim the loose end to overlap the starting point, ensuring a snug fit. Open up both ends of the binding strip and lay them flat, right sides together. Stitch along the diagonal line from corner to corner, then trim the excess fabric, leaving a quarter-inch seam allowance.
Step 6: Finish Attaching the Binding:
Once the binding ends are joined, finish stitching the binding to the quilt, ensuring that the stitching line is close to the edge of the binding strip. When you reach the starting point, overlap the binding ends and finish stitching to create a seamless finish. Trim any excess binding and press the binding away from the quilt.
Step 7: Finish by Hand or Machine:
Finally, finish the binding by hand or machine. For a traditional finish, hand stitch the binding to the back of the quilt using a blind stitch. Alternatively, use a decorative machine stitch to secure the binding to the front of the quilt for a modern touch.
Conclusion:
Joining binding strips on a quilt is a fundamental skill for quilters, and mastering this technique will elevate the quality of your quilt projects. By following the steps outlined in this guide, you can achieve a professional-looking finish and create beautiful quilts that will be cherished for years to come. Experiment with different fabrics and binding styles to personalize your quilts and unleash your creativity.
