Removing the background from an image in Adobe Illustrator can be a straightforward process if you follow the right steps. This guide will walk you through two popular methods: using the Pen Tool and the Image Trace feature. Both methods are effective, but the best one for you will depend on the complexity of your image.
Tools You Might Need:
- Adobe Illustrator
- Image file with a background you want to remove
- Patience and attention to detail
Steps to Remove Background Using the Pen Tool:
- Open Your Image: Start by opening Adobe Illustrator and importing your image. Go to
File>Openand select the image you want to work with. - Lock the Image: To prevent accidental movement, lock the image layer. Select the image, then go to
Object>Lock>Selection. - Select the Pen Tool: Choose the Pen Tool from the toolbar or press
Pon your keyboard. The Pen Tool allows you to create a custom path around the object you want to keep. - Trace the Object: Carefully draw a path around the object you want to keep. Click to create anchor points and drag to create curves. Ensure the path is closed by connecting the last point to the first.
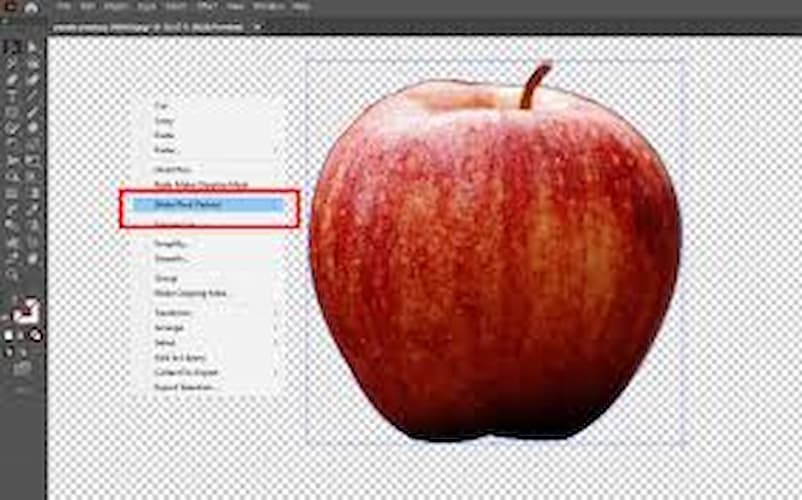
- Create a Clipping Mask: With the path selected, hold down the
Shiftkey and click on the image to select both the path and the image. Then go toObject>Clipping Mask>Make. - Adjust the Mask: If needed, you can adjust the mask by clicking on the right thumbnail in the Transparency panel and using the Direct Selection Tool to modify the path.
- Save Your Work: Once you’re satisfied with the result, save your work. Go to
File>Save Asand choose your preferred file format.
Steps to Remove Background Using Image Trace:
- Open Your Image: Start by opening Adobe Illustrator and importing your image as described above.
- Show Transparency Grid: Go to
View>Show Transparency Gridto make it easier to see the areas you want to remove. - Select the Image Trace Tool: Go to
Window>Image Traceto open the Image Trace panel. Select the image by clicking on it. - Adjust Image Trace Settings: In the Image Trace panel, choose a preset that best matches your image. For most cases,
High Fidelity Photoworks well. Adjust the sliders to refine the trace. - Expand the Image: Once you’re happy with the trace, go to
Object>Expand. This will convert the traced image into a vector. - Create a Clipping Mask: Follow the same steps as above to create a clipping mask using the expanded image.
- Save Your Work: Save your work as described above.